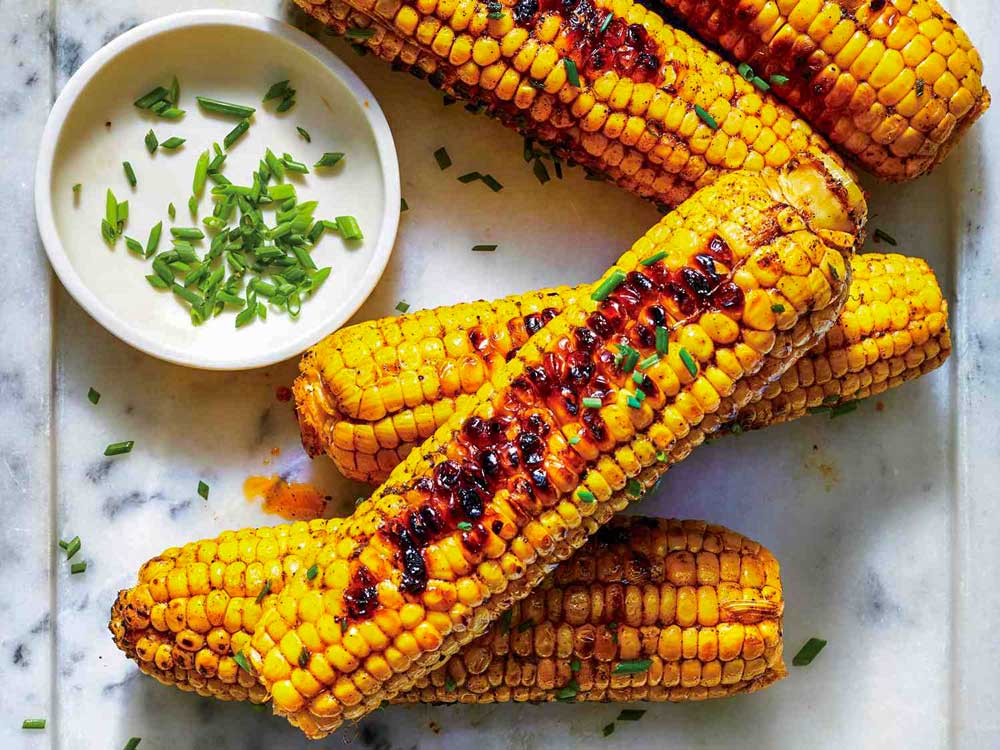
Welcome to the wonderful world of grilling! One of the best ways to celebrate summer is by firing up the grill and cooking some delicious corn on the cob. Grilling corn adds a smoky, charred flavor that takes this sweet and juicy vegetable to a whole new level. Whether you’re a grilling novice or a seasoned pro, this comprehensive guide will walk you through all the steps to grill corn perfectly every time. So, let’s get started!
Why Grill Corn?
Before we dive into the grilling process, let’s talk about why grilling corn is a fantastic idea. Grilling enhances the natural sweetness of corn and creates a delightful smoky flavor. The caramelization that occurs on the grill adds a touch of charred goodness, elevating the taste to new heights. Plus, it’s an excellent way to add a healthy and colorful side dish to your summer gatherings.
Selecting the Perfect Corn
Grilling starts with picking the right corn. Here’s what to look for when selecting your cobs:
1. Freshness: Choose corn that feels plump and moist when you touch the kernels. Avoid cobs with dry or shriveled kernels.
2. Husk Quality: Look for green, tightly wrapped husks that are free from wormholes or browning.
3. Silk Appearance: Ensure the silk (the hair-like strands) is light in color and moist. Avoid corn with dry, dark, or sticky silk.
4. Even Kernels: Check for uniform, well-developed kernels that go all the way to the top of the cob.
5. Preparation: Soaking the Corn
Before grilling, soak your corn in water for about 30 minutes. This helps to prevent the husks from burning and allows the steam to cook the corn evenly.
Grilling Methods
There are several grilling methods to choose from, each with its own unique charm:
1. Grilling in Husks: This method involves grilling corn with its husks intact. It results in a tender, steamed corn with a slightly smoky flavor.
2. Grilling in Foil: Wrapping the corn in foil with butter and seasoning gives you a juicy, flavorful result, perfect for those who prefer a mess-free option.
3. Naked Grilling: If you love the smoky, charred taste, grilling the corn without any husks or foil is the way to go.
- Method 1: Grilling in Husks
Step 1: Soak the Corn
Submerge the corn cobs, husks and all, in a large bowl or sink filled with cold water.
Allow the corn to soak for at least 30 minutes.
Step 2: Preheat the Grill
Preheat your grill to medium-high heat (around 350-400°F or 175-200°C).
Step 3: Peel Back the Husk
Gently peel back the outer husks of the soaked corn, but do not remove them completely.
Remove the silk, and then fold the husks back over the corn.
Step 4: Grill the Corn
Place the corn on the grill grates.
Grill the corn for 15-20 minutes, turning occasionally.
The husks will become slightly charred, and the corn kernels will be tender.
Step 5: Serve and Enjoy
Remove the corn from the grill.
Peel back the husks completely or tie them with kitchen twine for a rustic presentation.
Serve with butter, salt, and your favorite seasoning.
- Method 2: Grilling in Foil
Step 1: Preheat the Grill
Preheat your grill to medium-high heat (around 350-400°F or 175-200°C).
Step 2: Prepare the Foil Packets
Tear off large pieces of aluminum foil for each corn cob.
Place a corn cob on each piece of foil.
Add a generous amount of butter, your favorite seasonings, and a pinch of salt to each cob.
Step 3: Wrap and Grill
Tightly wrap the corn in the foil, ensuring no gaps for steam to escape.
Place the foil-wrapped corn on the grill grates.
Step 4: Grill the Corn
Grill the foil-wrapped corn for 15-20 minutes, turning occasionally.
The butter will melt, and the corn will become juicy and flavorful.
Step 5: Serve and Enjoy
Carefully unwrap the foil.
Transfer the corn to a serving plate and add more butter or seasoning if desired.
Dig in and savor the deliciousness!
You may also read: vegetarian chopped salad
- Method 3: Naked Grilling
Step 1: Preheat the Grill
Preheat your grill to medium-high heat (around 350-400°F or 175-200°C).
Step 2: Prepare the Corn
Peel back the husks of the soaked corn completely, removing all the silk.
Step 3: Grill the Corn
Place the naked corn directly on the grill grates.
Step 4: Grill and Rotate
Grill the corn for about 10-15 minutes, rotating every few minutes to ensure even cooking.
The kernels will become slightly charred, and the corn will be tender.
Step 5: Serve and Enjoy
Remove the corn from the grill.
Serve immediately with your favorite toppings or seasonings.
Final Tips for Grilling Corn
Experiment with different seasonings like chili powder, garlic powder, parmesan cheese, or lime juice to customize the flavor.
If you prefer softer corn, you can grill it for a few extra minutes.
Feel free to get creative with toppings like cheese, herbs, or hot sauce to add an extra kick.
Grilled corn pairs perfectly with a variety of dishes, from burgers and steaks to salads and seafood.
You may also read : Smoky Quinoa Taco Bowls with Fried Eggs
Conclusion
Grilling corn is a delightful culinary experience that captures the essence of summer. With a few simple steps and the right preparation, you can achieve perfectly grilled corn on the cob every time. Whether you choose to grill in husks, foil, or naked, the sweet, smoky flavor will surely be a hit at your next gathering. So, fire up that grill, grab some fresh corn, and get ready to impress your family and friends with your newfound grilling prowess. Happy grilling!